Pick a language
Focus
TMK 344 – Ferrari 312B Italian G.P. 1970 by Stefano Adami
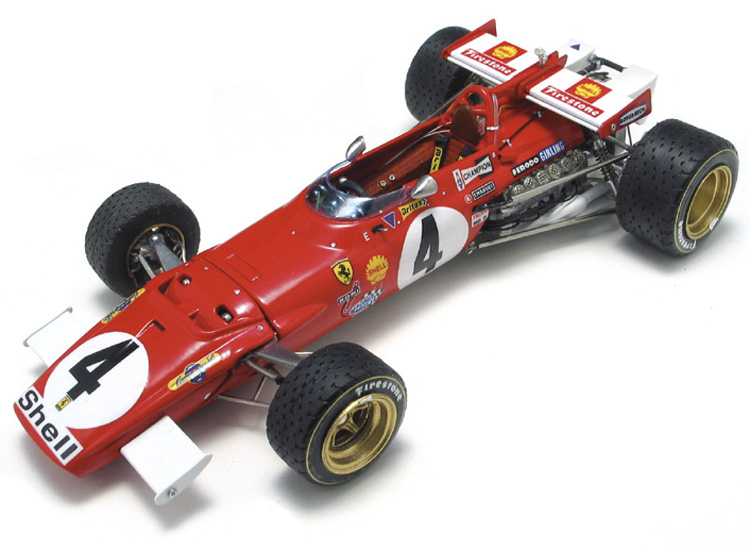
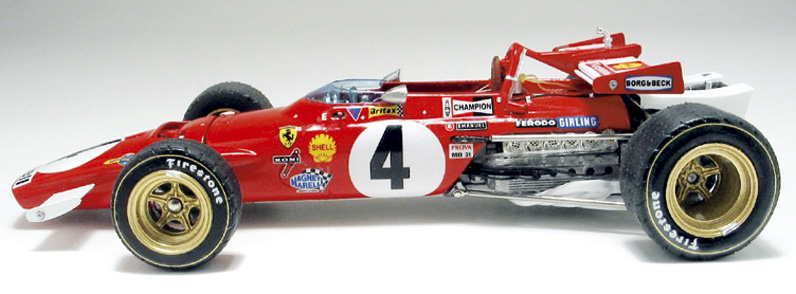
I must confess that I am not a lover of F1 racing, but nevertheless, I am pleased that a collector has asked me to assemble this Ferrari 312B model; this is the racing car model that Regazzoni drove to win the 1970 Monza Grand Prix. I am particularly pleased, because this gave me the possibility to test the quality of the products made by Luca Tameo, a model-maker, who I have never had the pleasure of meeting personally, but whose work I have appreciated. For example, I could refer to the Porsche 908/3 model, the prototype that was made for Meri Kits (proposed again later by FDS with the consent of Claudio Riva), which although did not follow precisely the lines of the car, it was nevertheless a clear indication of Tameo’s talent. Then, with the passing of time and experience acquired (but furthermore with the use of new technology for the construction of prototypes, which unfortunately has taken away the artisan craftsmanship of handmade kits), has consecrated Luca as the best producer of special F1 racing car kits world-wide (I am saying this without undermining the model-making capabilities of Bocisa and Make-Up); they construct models that are possibly even more technically sophisticated (surely due to the use of bodywork and chassis’ made by using the electro-forming technique), but, according to the experts, more difficult to assembly, (and more expensive……).
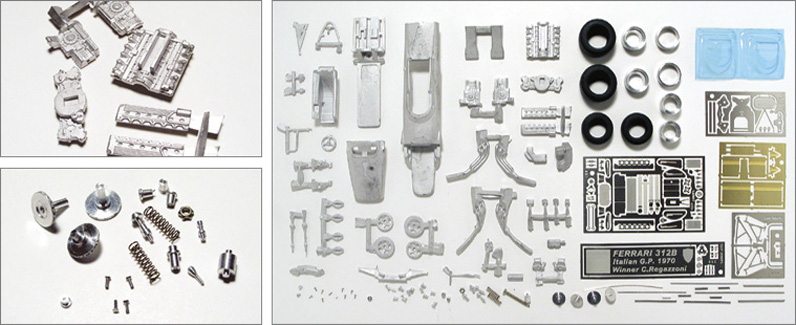
Tameo’s well-known discretion is evident by the packaging; a small, non-descriptive box, with the regular numbered stamp imposed by Ferrari (see royalties), but inside, one can find a high number of printed particulars, components, etc., to be added to the bodywork. It is these types of racing car accessories that have impressed me so much and make me realise that I am looking at a beautifully-finished kit; apart from the micro-turned parts, the inclusion of two sheets of decals is commendable (particularly if one imagines the graphics of the new F1 racing cars). Last but not least, the instructions………..It seems another world, compared to those found in other kits!
And if this is not enough…
You can always improve it, but the base is already very good as it is. The most experienced modelling enthusiasts will be able to make some exclusive models, but even those with least experience, due to the excellent instructions, will be able to assemble some very good models.
Formula 1 full optional.
The equipment that is supplied with the kits is indeed outstanding. The general quality is first-class and the large quantity of micro-turned and photo-engraved parts is quite astonishing; there are even some extra spare photo-engraved parts.
Great quality with a large quantity.
Nothing is left to chance; it could even be said that in some cases there has been some exaggeration. But then, during the assembly of the kit, one realises that only a few component or particulars were required. For example, for the cock-pit, one needs to assemble 17 components, some of which are very small…..by the way, not easy for the eyes.
Colour and wonder.
These are some of the examples of the drawings shown in the instructions that are provided; these are due to the expert use of the software already used for the input of the small milling cutters used to prepare the masters, but also due to the intense will of Tameo in wanting to assist the model-makers in the assembly of his kits in the best way possible. Other kits makers use the same techniques for the making of the prototypes, but it stops there.
Long and meticulous preparation.
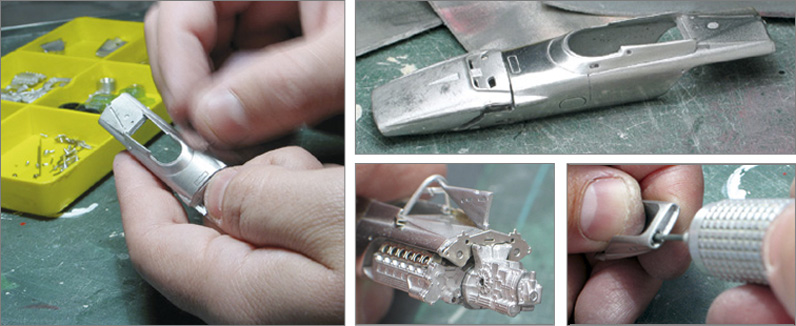
After having divided the components according to the finishing, I began a meticulous check and preparation of all the components assembly. The actual body work did not show any faults and did not require any type of plastering touch-up; I then polished all the metal parts, which meant that I did not need to paint any of the parts.
Very few checks.
The absolute precision of the kit has meant that I did not have to carry out any preventive checks; the only one I had to carry out was to modify the position of the gears, ensuring that they were in the correct position, in relationship to the photo-engraved finishing of the shock absorber supports. The only major modification I had to make was the opening of the air intake inlet on the front of the bonnet, which was strangely closed.
Last-minute preparations.
The internal sides of the body were slightly tight, therefore, I filed the part of the seat that I hi-lighted in red; I also did the same for the rib on which the cockpit was to be assembled. I prepared the suspension for the assembly, by drilling 0.3mm holes on the cockpit, on the metal arms and on the wheel hubs. As I have already explained, instead of painting them in silver, I chose to polish all the metal parts profoundly, by using the special pads and rubber mills, where necessary. I left the main engine rough and unpolished, as this was supposed to be painted in aluminium. I then painted everything with a shiny and transparent solution, which serves as a protection against possible deterioration, due to the passing of time (for example, loss of shine on the various parts).
Internally and externally
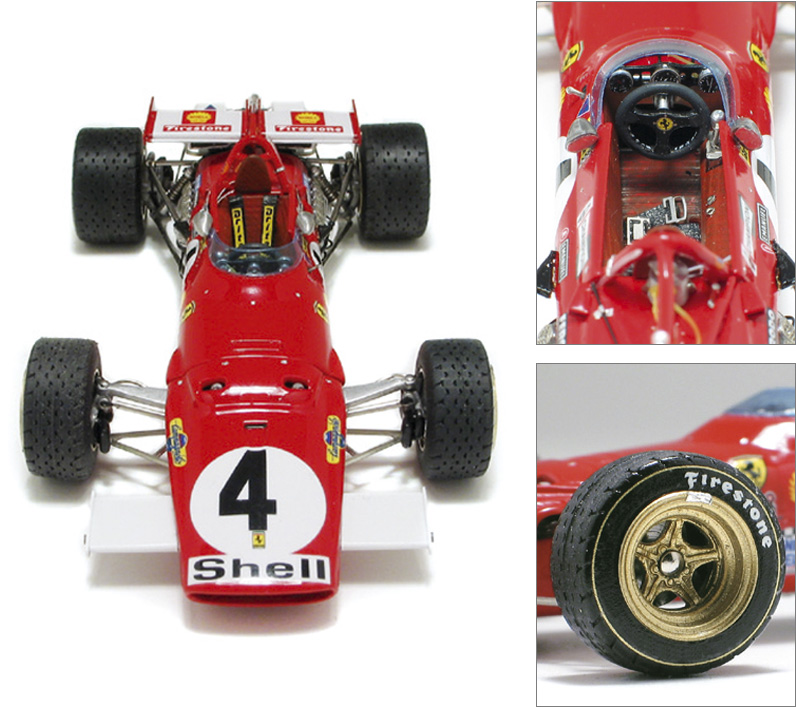
The front of the car underlines another small shortcoming; the air intake inlets are not open, but as I noticed that they should be in black and as they are very small, I chose not to modify them. The picture of the driver’s compartment shows that the steering wheel is covered by a number of very small white dots, which represent the stitches of the internal coverings. These small details underline once again, the attention that Tameo applies to even the smallest particulars of his kits.
Initial assembly
Once the preparation had been completed, and the single components had been painted, I began to, most of the time, assemble the kit following the chronology indicated in the instructions. On the upper left-hand side of the picture, you can see how I modified the radiator, by fixing the photoengraving towards the front of the bonnet; I did this (having already opened the air intake inlet), thinking that it would be seen more clearly. In the other pictures, one can see parts of the assembled suspensions and a specially detailed view of the ignition cables, which I made from a support loom for Tamiya Pneumatics; from this, I obtained some very flexible and elastic cables. The ignition channels were obtained by cutting very narrow strips from an acetate film. They are not of a circular size and are not fixed to hypothetical injectors, but nevertheless, they look very good.
306° on a “V” of 180°
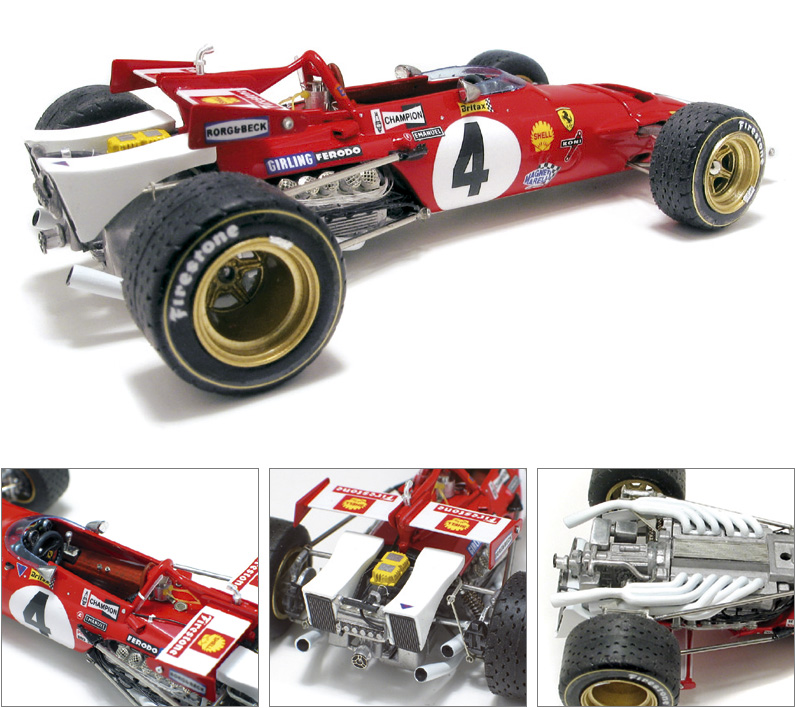
A good round-up of pictures that rotate around the mechanics of the back part of the model, which enables us to see all its various details. The parts to be hi-lighted are the metallic effects of the engine and its related elements; all of these are obtained by a very well-performed polishing process. In fact, nothing is more effective than the colour of shiny metal than the metal itself. The most meticulous modelling enthusiasts can modify the exhaust, by replacing the original part with an empty pipe. The support plate for the battery was missing, but I easily made a new one by using a part of the photoengraving, which was originally made from a sailing platform. A delicate operation for the making of numerous cables and channels relating to the fuel system, has given the model a little extra touch. On the right-hand side picture, one can see the photoengraved screens of the trumpets; it is quite true that the stitches are slightly heavy, but when you see them on the real-size model, they look the part. Even the small rivets on the vertical wings of the spoilers and the ones fixed on the seat, are part of my private collection of scraps of various materials. The seat should have been covered by a very nice decal, which would have been a reproduction of the texture of the original material, but the strong material used to make the decal (combined with the inability of placing the decal in difficult positions), did not allow me to use it. I remedied this by trying to reproduce a similar effect by painting it in Bordeaux and black colours.
On one hand, the absolute precision of the various components allowed me to work without having to make any modifications during the operation of assembly, whilst on the other hand it made me realise that it was enough to make one mistake with one part and this would lead to all the other parts being out of connection (particularly the suspensions). Nevertheless, considering the whole process, the feeling of uncertainty that I felt at the beginning (due to the complexity of the job), changed during assembly, into one of particular attention in the pacing of all the components in their correct position. Even the part dedicated to the pre-assembly operation was relatively easy: it is necessary to make very small holes (0.3mm) for the insertion of minute pivots for the fixing of the suspensions. I would advise you to pass over the photoengraving that surrounds the outline of the cockpit, again; if not, there is a chance that the paint will cover it (as this happened to me….). To conclude, I would say that this is a kit that I would be pleased to recommend to a modelling enthusiast who had some notions regarding kit assembly, whilst the most experienced ones will be able to obtain something superlative. My compliments and congratulations to Mr. Tameo, with my wishes that he now turns his attention also to other types of cars…..there are in fact rumours….
