Pick a language
Tutorial
Section 1 – Introduction (edited by Michael Kelly)
This assembly manual has been prepared to accompany the Tameo Kits range of 1/43 Formula 1 scale models. It aims to provide a step-by-step overview of a range of techniques for beginners through to advanced builders in the hope of encouraging modellers to try assembling a 1/43 kit.1/43 has been popular for many years with devoted builders and collectors who appreciate the opportunity to keep a large collection of models in a small space. While 1/43 kits are perhaps less well-known than the main-stream plastic automotive scales of 1/20 or 1/24, there is much greater diversity of subject matter allowing modellers to build a collection of models that appeal to them.
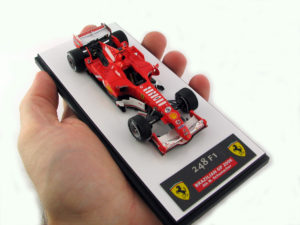
In recent years there has been considerable investment and innovation from Tameo Kits to develop its kit design and manufacturing techniques. Models are now exclusively designed using computer aided design and manufacture techniques, resulting in extremely high level of detail and accuracy in the finished models.
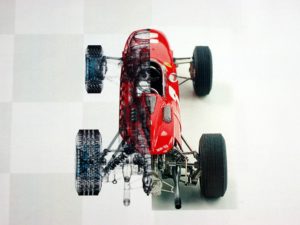
Tameo Kits is a small artisan company, highly specialised in the manufacturing of exclusive models on a 1:43 scale, which are made completely out of metal. Since 1983, we have been manufacturing and marketing kits of various Formula 1 single-seaters, which have participated in every racing circuit world-wide. All the operations relating to the planning, design, prototypes manufacturing, casting,production of the equipment for the preparation of the transfer decals and photoengraving are carried out within the company. The use of the most modern and advanced computerised technologies, together with the high craftsmanship of our personnel, allows us the advantage of being able to offer to all our collectors, models that are always in accordance with the high quality standards required by a market that is in continuous evolution.
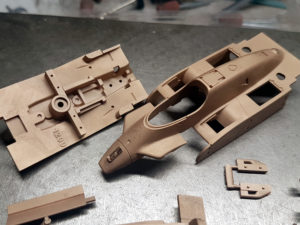
1.1 – Selecting a kit
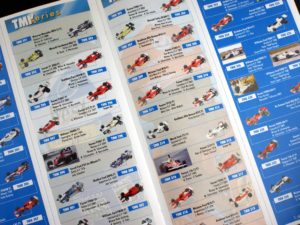
The combined Tameo Kits and SilverLine catalogue includes nearly 500 different models stretching from the 1952 to the very latest single seaters. The full listing of kits is available on the Tameo Kits website (www.tameokits.com), in the Tameo catalogue titled ‘Turtle Soup 3’ as well as on the websites of many of Tameo’s distributors.
1.1 – Selecting a kit
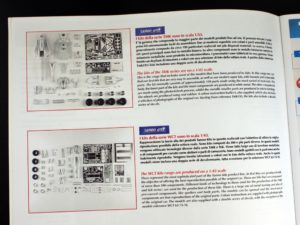
In addition to spanning many racing seasons, the Tameo range also includes a wide variety of kit types. Early kits are almost exclusively cast in white metal. Later models include an increasing amount of photo etched parts, with more recent models being fully designed on computer and featuring very high levels of detail. The most detailed kits are the World Champion Tameo (WCT) series and the ‘SuperKits’ included in the TMK range. These kits typically feature lift-off body panels and full engine detail. The aim with these models is to provide the most accurate reproduction possible of the real car. Detail on the different collections is available on the Tameo Kits website.
1.1 – Selecting a kit
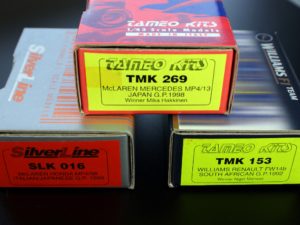
Another aspect to consider in selecting a kit is the complexity of the real machine. Modern grand prix single seaters feature a staggering array of aerodynamic components so even a ‘curbside’ (no engine detail) kit can be challenging project. Above all, it is important to select a car that you are interested in as this can help keep up motivation during the build. For the “First Build” section of this manual, I have chosen to feature Tameo’s recent Ferrari F189 kit. This is a well detailed model, but the quality of the kit development and design makes it a realistic project for a beginner. For fans of different race teams, a range of other Tameo / SilverLine kits are also good projects for a first build (McLaren Mp4/5B (SLK 016), McLaren Mp4/13 (TMK 269), Williams FW14B (TMK 153)
1.2 – Ordering through distributors
Having selected a kit, the next step is to find a retailer to supply the product. Tameo models are sold through a distributor network
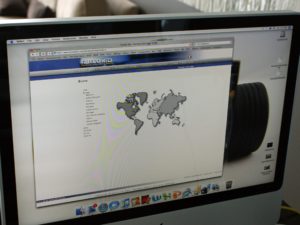
spanning many countries. The Tameo Kits website provides a listing of distributors and allows modellers to search for stores in their region. In some countries, Tameo models are available by visiting retail stores, but for most areas, the easiest option will be mail order.
1.2 – Ordering through distributors
Many distributors have a dedicated website for processing orders and payment. In all cases it is advisable to check on whether a particular kit is in stock. Given the size of the Tameo range, distributor tend to carry stock of only a selection of cars and backorders from the manufacturer can sometimes add a month or two to the delivery time.

1.2 – Ordering through distributors
It is also recommended to request a quote for shipping costs for the kit as these can vary significantly between countries. Most websites provide detailed information about shipping policy and cost, but it is often safer to confirm specific details for a first order. Finally, if you have not ordered model kits by mail order before, it is important to check for any import taxes are levied by your government.
These are different in each country and are generally unavoidable, but knowing about them can avoid a nasty surprise when your kit arrives in the mail.

1.3 – Modelling space
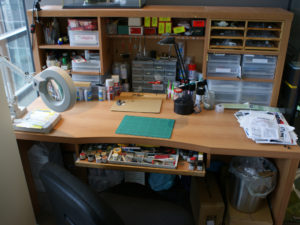
The key elements of a good modelling space are a stable flat surface, a comfortable chair and good lighting. If possible, it is ideal to set up on a desk or table that can be dedicated to modelling for the duration of the assembly process. If the project needs to be cleaned away after each session, it may be helpful to have a sturdy cardboard box with a flat bottom (for example the type that plastic kits come in) to minimise the risk of losing parts.
1.3 – Modelling space
If you are fortunate enough to be able to set up a dedicated area for modelling, there is an opportunity to customise the space to ensure tools and supplies are readily available. Modeller’s workbenches seem to be as unique as fingerprints and reflect each individual’s habits and techniques.The arrangement shown in these pictures has developed over the past ten years, but is almost certain to evolve further as techniques change and I get ideas from other modellers. My modelling desk comes from an office supplies store and provides are large, flat work area and a number of different shelves for storage above the desk surface. It can get pretty messy at the end of a long session!
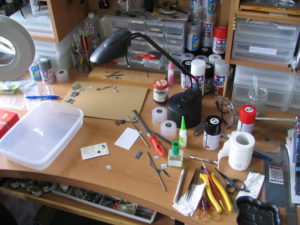
1.3 – Modelling space
On the surface of the desk, I have a small cutting mat and a wooden block with holes drilled in it for holding parts during construction and while paint is drying.
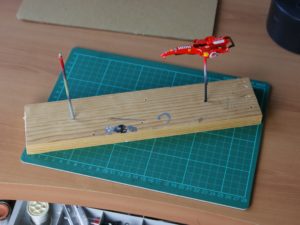
1.3 – Modelling space
Under the desk, a sliding keyboard tray is used to store paints, putties and tools. I also have a stack of cardboard shipping boxes under the desk containing unbuilt kits. These are catalogued in a spreadsheet so I can always find a particular kit quickly when its time to start a new project.
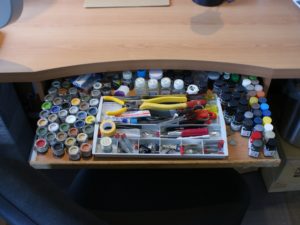
1.3 – Modelling space
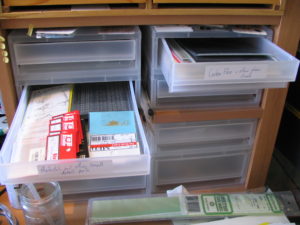
Plastic drawers have been added to a number of the desk shelves to provide additional storage for supplies. Each drawer is used to sort one type of product or part. For example, there are separate drawers for carbon fibre decals of different sizes, colours and designs, another drawer contains metal rod, tube and sheet for modification and detailing, yet another has various photo-etch and machined detail parts including nuts, bolts, rivet heads etc.
1.3 – Modelling space
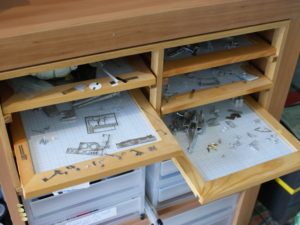
In another shelf above the desk I have installed a custom built frame to hold kits that are currently in progress. Each ‘shelf’ is a simple wooden picture frame and can easily be pulled out and placed on the desk to work on a particular project. This arrangement keeps the parts for each kit together and minimises the dust build up on the parts.
1.3 – Modelling space
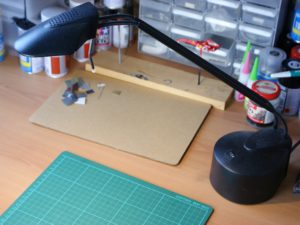
While the windows near the desk provide a good source of light, much of my modelling is done at night, so good lighting is essentially.
The two lamps on my desk are a halogen lamp for bright but sharp light and general desk light to ‘boost’ the lighting provided by the roof lights. Neon desk lamps are also a good idea as they don’t create harsh shadow – this can be useful when working with small parts in tight spaces.
1.3 – Modelling space
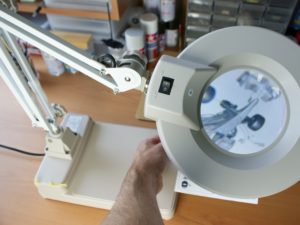
While 1/43 kits can be assembled without magnification, I find that a little enlargement can help with some detailing activities such as
adding wiring to an engine. There are many solutions to this, but the important thing is to get a high quality lens that can be used
‘hands-free’ – either desk mounted as in the photo, or as a head mounted opti-visor.
1.3 – Modelling space
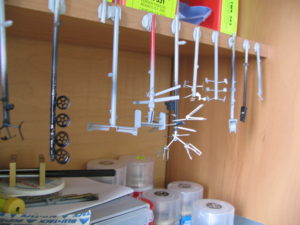
As will be demonstrated in the build manuals, kit parts are typically mounted on plastic sticks for ease of handling
during painting and assembly. A row of blu-tack is used to hold drying parts, or larger pieces are mounted in a small block of wood.
1.3 – Modelling space
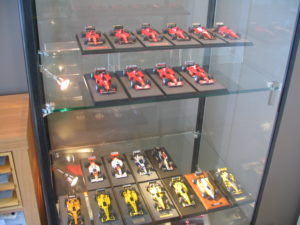
While completed models can be displayed or stored anywhere, it can be a good source of motivation to have a growing collection of cars
near the model desk. For this purpose, I have a glass display cabinet next to my desk.
1.3 – Modelling space
Although not technically a component of a modelling space, but an important consideration none the less, finding the right time for modelling can have an
important impact of successful projects. Getting clear time with few distractions is hard for many people, but it is important to be fresh and alert when working with sharp tools and small parts!
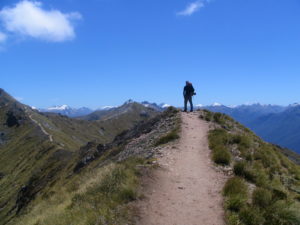
On a related point, working on fine detail parts for a long period of time risks muscle tightness and fatigue.
Whenever possible, pay attention to your posture and try to take regular breaks to walk around, stretch and get some fresh air – though not necessarily
to the extent shown in the picture! Modelling is fun and the last thing you need is neck or back pain to spoil it.
1.3 – Modelling space
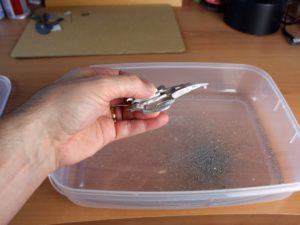
Finally, when setting up a modelling space, pay particular consideration to where parts will fall if dropped. It is almost inevitable that small parts will be dropped during filing and sanding. To this end, I regularly work over a small plastic food container to catch both the shavings from the part, but also the part itself if dropped. This container can be emptied into a rubbish bin at the end of a session.
1.4 – Reference material
Most Tameo models include a number of photographs of the real car to help modellers assemble an accurate model. While not strictly necessary, it can sometimes be useful to track down additional material on a particular car if you are considering a custom paint mix or the addition of extra detail parts.
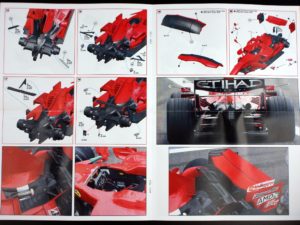
1.4 – Reference material
Reference can be gathered from a number of sources, including visits to grands prix, automotive museums, books and the internet. At all times, pay particular attention to any modifications that have been made to the car in question. Most grand prix cars are slightly different at every event and in particular, historic cars are often updated or modified during refurbishment. The best reference is always photographs taken at the actual race weekend for which the car is being modelled.
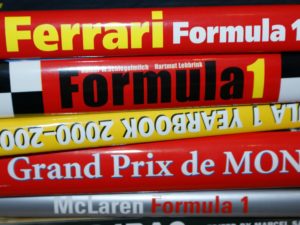
1.4 – Reference material
There is a near infinite supply of reference material on the internet and in book stores, but two good places to start are: Books featuring the photography of Rainer Schlegelmilch (in particular Ferrari Formula 1, McLaren Formula 1 etc), Websites such as www.gurneyflap.com, www.f1-photo.com, www.schlegelmilch.com, and Google image search
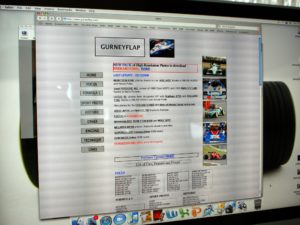
1.5 – Tools
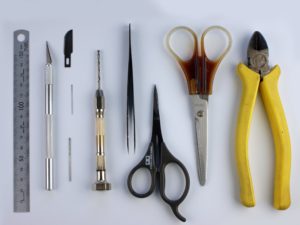
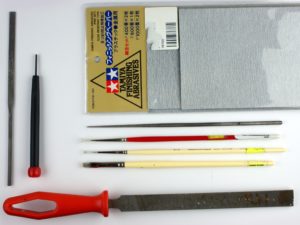
Similar to a modelling space, the tools that modellers use in assembly can be many and varied. For a first build, the key tools needed are:
– Hobby knife – with straight and curved blades
– Pin vise (hand drill) – with 0.6mm and 1.0mm drill bits
– Metal ruler
– Tweezers
– Scissors and side cutters
1.5 – Tools
Further tools used in a first build:
– File – ideally one flat, one round
– Paint brush – A size 0 is a good starting point, and a larger flat brush for clear dust from parts
– Sandpaper of various grades
– Small screwdriver
1.5 – Tools
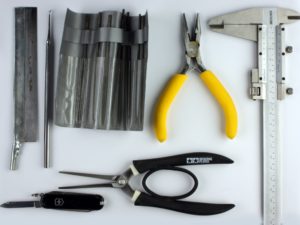
In addition to the list above, other tools that may prove useful for different, specific applications in assembly.
– Scriber
– Saw
– Small knife for applying filler
– Various files
– Calipers
– Photo etch bender
– Dremel or other motor tool (see section 2.5)
1.6 – Glue
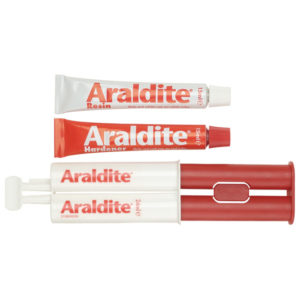
As Tameo models are made almost exclusively from metal, normal hobby plastic cement will not bond the parts. This leaves modellers with a choice between superglue, two-part epoxy glue or solder.Two-part epoxy glue is preferred by many modellers as it generally gives a stronger bond than superglue and will not frost the parts near a join. The only real negative is that the glue needs to be mixed before use and also if the
two components are not mixed well, or in equal portions, it will not cure effectively.
1.6 – Glue
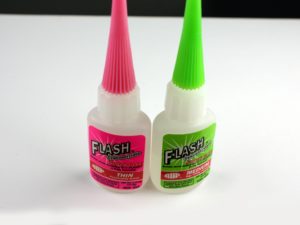
The main positives of superglue (sometimes called CA glue) are that it can be used straight from the bottle, dries quickly and if used carefully, gives a very strong bond. The negatives are that the join can sometimes be brittle and that the glue released a gas as it cures that can ‘frost’ the area next to the join. This makes the glue inappropriate for attaching clear parts and also more difficult to use on parts that have been clear coated. Both thin and regular superglue will be used in the build manuals.
1.6 – Glue
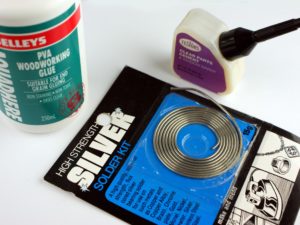
Wood glue (or specific “canopy glue” as shown in the accompanying picture) can be used for attaching clear or very small parts because the glue dries clear, is water soluble and easy to clean up in the event of a spill or overflow.Some modellers make considerable use of solder in assembling Tameo models. This technique will not be demonstrated in the build manual, but after practising with some spare metal from a kit, modellers may wish to use this method to get a strong bond between etched brass components.
1.7 – Filler
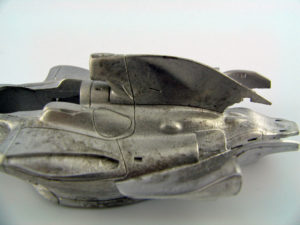
Despite the precision engineering of the parts, it is inevitable that small joins will be evident where kits parts are brought together. The accompanying picture shows the airbox of the McLaren Mp4/23 test-fitted to highlight the join.In the small scale of 1/43, these joins need to be carefully filled as they can be very evident after completion.
Modellers generally have four options for filling gaps depending on the size of the join.
1.7 – Filler
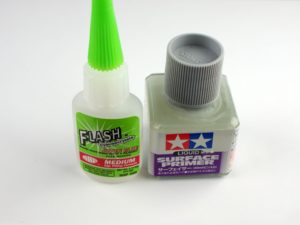
For minor surface scratches and imperfections, primer can generally act as filler. In particular, a high-solid primer like Tamiya surface filler can be painted onto problem sections and sanded back to a smooth finish.For close fitting parts and slightly larger surface imperfections, the gap filling quality of superglue means it can be used as filler.
The glue can be dabbed into the area to be filled and then sanded once dry. Both these techniques will be demonstrated in the build manual sections.
1.7 – Filler
For slightly larger cracks and general surface imperfections, standard hobby filler like Squadron White Putty is very effective. The putty can be applied to the section with a knife or similar tool and then sanded after it has cured (c. 24hrs). The only drawback with this product is that it shrinks slightly on curing.
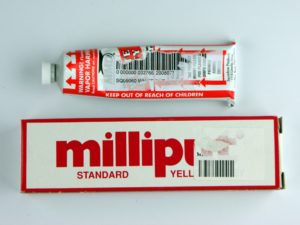
For major filling or body modifications, a two-part putty like Milliput is the preferred option. This putty requires careful blending of the two components, but adheres well to metal, can be sculpted with a variety of tool, smoothed with a paint brush dipped in water, and once cured, can be carved and sanded to blend perfectly with the surrounding metal parts.
1.8 – Paint
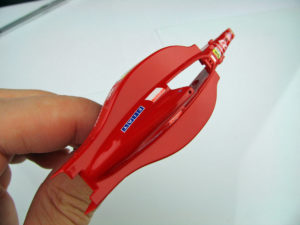
With real grand prix cars typically painted in a smooth, glossy finish, achieving a high quality paint finish is an important element of building a convincing scale replica.
The painting process covers three broad steps; priming, colour coats and clear coats, with each step able to be completed via spray can or airbrush.
Models can be painted with a brush using appropriately thinned paint, but given the challenge of achieving a smooth, even finish with this approach, spray paint (either spray can or airbrush) is strongly recommended.
1.8 – Paint
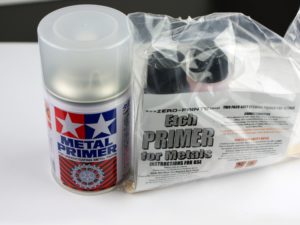
Looking first at the primer coat, the intention of this step is to seal the metal parts with a consistent base colour and provide a strong base for later paint applications to adhere to. It is important that the first primer coat is an ‘etch’ primer so it bonds well with the metal parts. Tamiya produces a clear metal primer, but similar products are also available from automotive and specialist paint stores. Zero Paints also makes an etch primer for airbrush application.
1.8 – Paint
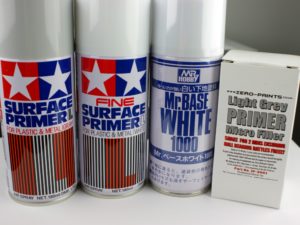
Following the etch primer, a grey or white primer may be applied, either from a spray can or airbrush. Tamiya’s products are excellent, but again there are many products on the market with most offering good characteristics. As colour coats often appear brighter if applied over a white base, I will typically apply 1-2 coats of
Tamiya grey primer with a light sand after both coats, followed by 2 light coats of the white primer. This generally gives an excellent base for the colour to follow.
1.8 – Paint
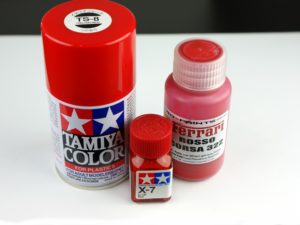
Moving to the all important colour coat, there are two key considerations, firstly selecting the type of paint (both lacquer vs acrylic and spray can vs airbrush) to be used and then matching the colour to the car being modelled.
1.8 – Paint
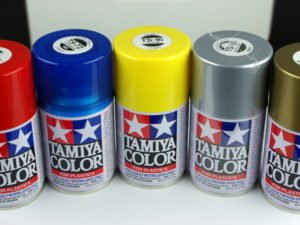
Spray cans are readily available, simple to use and provide a good level of coverage. The negatives are that the rate of paint flow can’t be controlled and achieving good colour coverage can require thicker coats of paint. Spray cans will be used for the body parts in the first build section, and for a variety of other applications in the other sections, and excellent results are possible using this method.
1.8 – Paint
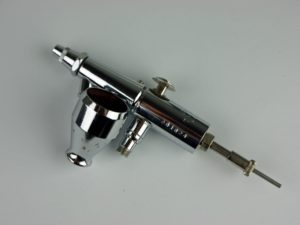
Spraying with an airbrush may be preferred to spray cans as it allows custom mixing of colours, greater control over the delivery of the paint and the ability to achieve a finer and more even coverage on the model. The only real draw back is the time required to clean an airbrush between colours and after use, though with practice this takes little more than 5-10 minutes.The airbrush shown is a Paasche VL double action. It is now about 15 years old, and a visit to an airbrush retailer will indicate the wide variety of brushes currently available.
1.8 – Paint
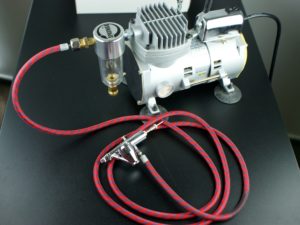
A typical airbrush setup involves a compressor, air hose and the airbrush itself. Paint is mixed to the desired colour, thinned and fed into the airbrush from a paint cup.
A ‘double action’ airbrush allows the flow of both air and paint to be separately controlled, allowing the greatest painting flexibility. After a colour has been sprayed, thinner can be poured into the paint cup and blown through the airbrush like paint to clean out the colour. More detailed discussion of the use of an airbrush will follow in later sections.
1.8 – Paint
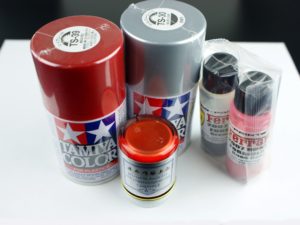
With grand prix cars often painted in unique, custom mixed paints, matching a particular livery can be a significant challenge. Where a close match is available amongst the Tamiya paint range, Tameo will provide the colour code for the Tamiya spray can. Otherwise a reference number for an automotive paint is provided. Most automotive paint suppliers offer a matching service and can provide paint mix ready for use based on these colour codes. However, even supposedly ‘matched’ colours can differ – as shown in this collection of colour options for the 2007 Ferrari.
1.8 – Paint
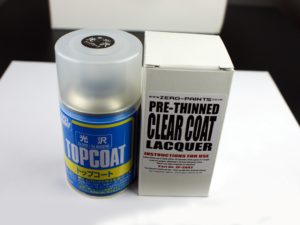
After decaling, the final phase to model painting is clear coating. As with other layers, a variety of options are available, from spray cans, to airbrush lacquers, Future floor polish and 2-pack high solid coats.
Clear coating will be discussed in detail in the build manuals, but excellent results are possible with any of the available paint options and modellers should experiment with each to find a solution that matches their preference.
1.9 – Sanding and polishing
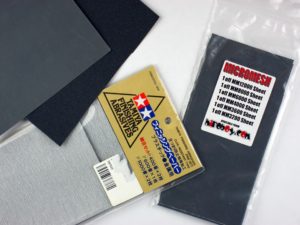
Smoothing down imperfections and join lines in kit parts as well as rubbing back the paint coats on the body of a model are key steps in a successful build. These steps will be demonstrated in the relevant sections, but shown in the picture are the range of sand paper that is available from hobby and hardware stores as well as micromesh cloth used for rubbing back painted surfaces.
1.9 – Sanding and polishing
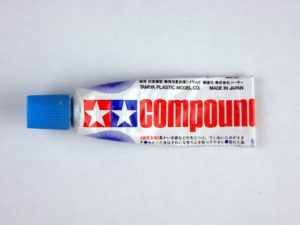
Hobby ‘finishing compounds’ are useful for polishing a clear coat after sanding. Some modellers have considerable success using modelling wax to achieve a gloss finish.
Again, experimentation with different products will help modellers find products that give the desired result.
1.10 – Internet resources
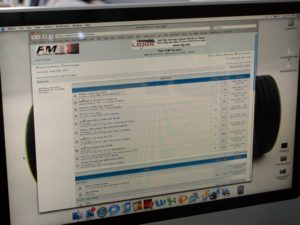
While this build manual aims to demonstrate many aspects of assembly and finishing of 1/43 model cars, it only shows the techniques and approach of one builder. Build diaries and finished model photographs on the Tameo Kits website as well as build diaries on web forums such as www.f1m.com can provide a much broader range of hints, tips and inspiration to builders.
Internet forums have the added benefit of allowing questions to be posted if you have specific queries, or encounter difficulties with part of a build.
1.11 – Photography
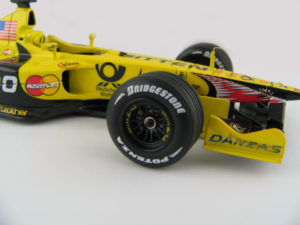
While many people build for personal satisfaction, sharing digital photographs of your work with family and friends can be a great way of showing people what you are up to. I am very much a beginner photographer, and indeed, photographic techniques and equipment could easily fill a book on its own, but a few pointers may help to get you started.The most important aspects in taking good photographs of models are having sufficient, natural quality light, defusing that light to avoid harsh shadow, and good depth of focus and colour clarity.
1.11 – Photography
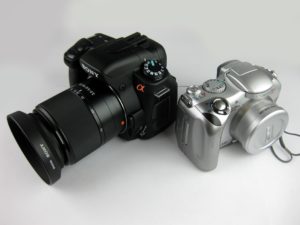
The photos in this build manual are taken with a Canon Powershot S1 IS. The camera captures images at 3.2 megapixel and is small enough to allow ‘in progress’ pictures of the modelling techniques. Pictures are generally taken at 1/160th exposure, ASA 100 speed, F3.2.Completed models are generally photographed with a Sony Alpha A350 for greater control over the image and higher resolution.
1.11 – Photography
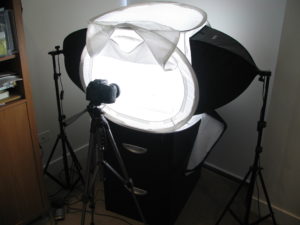
For lighting, I have two 70W natural colour, neon photographic lamps with defusers. Desktop photos are taken with lighting direct from the lamp, while shots against a white backdrop (including all photos of the finished models) are generally taken inside a light tent (as shown in the accompanying picture). Light tents are available commercially, however similar effects can be achieved by using kitchen paper or fabric used to defuse the light and standard neon desk lamp (or even natural daylight) as the light source. There are many good tutorials on the internet in relation to still life photography, but there is no substitute for experimentation and careful note-taking to find a formula that works.
1.12 – Safety
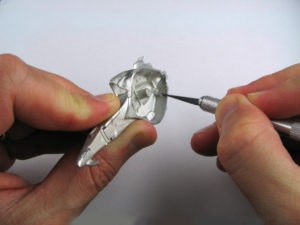
While it may be stating the obvious, it is extremely important to develop safe modelling techniques when working with knives. Hobby blades (especially when new) are extremely sharp and there is a significant risk of injury if they come in contact with skin. When cutting, always hold parts so that all fingers are behind the blade and the direction of cut is away from the body. Where possible, cut directly onto a cutting mat. Some of the most commonly available hobby knives have round handles and can roll on (and off) a desk if bumped. This raises the risk of injury to legs and feet from falling knives.
One solution is to superglue a small piece of plastic somewhere on the side of the handle to prevent it from rolling.
1.12 – Safety
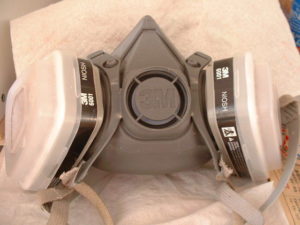
Another potential concern is inhaling paint fumes and dust. Depending on the materials being used, the fumes and dust can potentially be harmful to your health. Always read the specific health warnings on any products being used, and if in doubt, seek additional information from your paint supplier or a doctor. Masks are often available from paint stores and wearing one is a good idea when painting the model – especially if there is limited ventilation.
1.12 – Safety
Finally, one of the biggest enemies of good model building is tiredness and fatigue. Nothing makes a paint line go wobbly or a file go astray than tired eyes and twitchy fingers. If you feel tired, take a break. The model will still be there tomorrow. Keep reminding yourself that nothing slows progress more than having to go back and undo a mistake. When it comes round to your first all-night run to try to finish a car for a model show or other deadline, you may see the humour in the accompanying photo. Then again, perhaps its just cruel.…
